Sorry, it has been a month since I posted! I am actually in the middle of re-junkifying 2 little projects but it is taking me longer than planned-- baby was sick, hubby was sick, bla bla etc. etc. Those are my excuses. So, I am posting something I made a few months ago for my sister. It was so fun to make and I think they are so cute in any room! The picture is not the best but it is all I have for now.
 It is really a simple project! I ordered over 200 corks in bulk from Etsy for only 6 bucks. Seriously! The frame was one of those cross ribbon picture holders (I have no idea what they are called...do you know what I am talking about?!?), and I bought the knobs at Hobby Lobby. Each knob was under $2! Holla!
I love this project because the more "imperfect" it is I think, in my opinion, makes it look even better! You can either lay out your corks just like you want them or just glue as you go. I kind of did both. And lastly, I just screwed the knobs right into the back!
You can use any size frame, paint it some funky color, glue some corks on it and use it for anything! I made Katy's so she could use it for her necklaces.
Overall, this project cost me about $14. I'm making myself one so I will post pics when I am finished!


 I bought the I heart U milk jugs from Target for $2, I already had the red candle holder, the heart sticks are from dollar tree for $1 and the glass LOVE holder for $1 at dollar tree.
 This was one of my favs! I actually got the idea from another blog that was posted on
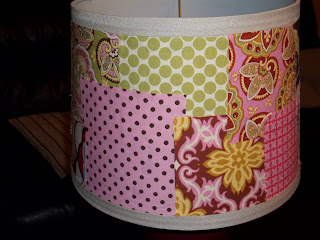
  I bought the frame from dollar tree for $1, I already had the fabric squares (same ones I used to make the patch work lamp in my previous post), and I bought the sparkly, red LOVE letters from Target dollar bin for $1! All I did was arrange the fabric in the frame how I liked it and I super glued the LOVE to the glass. Cute!
 Glass LOVE holder again. Dollar Tree is where it's at.
 Isn't "vintage teal" so pretty?! AH, I love. Please ignore the bottom drawer that is slightly open. Guess I was too lazy to close it for the pic.
 I was going to hit Hobby Lobby to get some new knobs but after cleaning/polishing the old ones I decided I loved the look. I love how the wood shows through the paint. Might have been an accident but I went with it!